Running Qwen Image 2.1 on a rented RTX 5090 in the cloud
I rented an RTX 5090 to try an open image model and tested its speed, image quality, and VRAM use.
I wanted to try generating images with an open model on hardware I rented myself. I chose Qwen Image 2.1 and rented an RTX 5090 with 32 GB of VRAM through Vast.ai to find out what would run, how fast it would be, and what image quality I could get.
The GPU cost about $0.70 per hour. The initial setup and experiments took roughly one to two hours, so that rental cost was about $0.70 to $1.40.
The first working setup was fast. It wasn't the one I kept.
Start with a fast FP8 pipeline
I initially loaded the image transformer and Qwen3-VL encoder with FP8 weights, while keeping computation in BF16. The VAE also stayed in BF16. The whole image pipeline remained on the GPU, with KV caching enabled and one request running at a time.
A warm 1024 × 1024 image at 25 steps took 11.2 seconds and peaked at 23.2 GiB of allocated VRAM. Compiling the repeated transformer blocks brought that run down to 8.9 seconds, at a peak of 25.2 GiB. I couldn't see a meaningful image-quality difference from that compilation change.
I tried more aggressive compilation too. Full pipeline compilation stopped at a Tensor.tolist() call in the positional-embedding code. Compiled FlexAttention failed during PyTorch lowering. Regional compilation worked, so I kept that result for the FP8 experiments.
Faster was not always better
Dynamic FP8 quantization of the activations cut a 1024 × 1024 run to 5.1 seconds and reduced its peak to 19.1 GiB. But the output had visible coloured speckles. That was a poor trade for the images I wanted, so I dropped it.

I found a similar problem when I enabled VAE tiling at ordinary resolutions. At 1024 × 1024 it introduced faint coloured speckles. In the final application, normal BF16 VAE decoding handles smaller images; tiling turns on only when either dimension reaches 1536 pixels.
The FP8 weight-only pipeline itself remained fast and usable. I moved on because I wanted to see whether I could run the image model in full BF16 precision within the same 32 GB card.
Fit the BF16 model by moving components
Keeping every component on the GPU at once wasn't necessary. Diffusers' enable_model_cpu_offload(gpu_id=0) moves the active encoder, transformer, or VAE through the GPU as the pipeline needs it. I loaded the Qwen Image 2.1 pipeline in BF16 and used that offloading mode.
My first standalone 512 × 512, 10-step smoke test took 14.3 seconds and peaked at 16.4 GiB. The full BF16 pipeline fit with room to spare. It was slower than the earlier resident FP8 pipeline, but I preferred the image precision and the simpler quality decision.
The final application also supports image editing. An edit at 512 × 512 and 10 steps took 13.3 seconds for the image stage and peaked at 19.1 GiB. Editing passes the instruction directly to the image model; it skips prompt rewriting so a precise change isn't reinterpreted.
The prompt enhancer took most of the time
I added Qwen's official 9B prompt enhancer. It rewrites a short prompt into a detailed description and suggests an aspect ratio. The application maps that ratio to a resolution of roughly one megapixel. Before each image run, the enhancer moves onto the GPU; it returns to CPU before the image pipeline starts.
The enhancer made the whole request feel much slower than the image generation numbers alone suggest. In one 1216 × 832, 40-step test, the prompt stage took 41.7 seconds and the image stage took 26.4 seconds. Peak allocated VRAM was 17.5 GiB. That is a measurement from my instance and that particular run, not a general benchmark for the model.

Installing Flash Linear Attention helped the enhancer: warm prompt runs later measured 26.5–31.0 seconds. I also tried to install causal-conv1d, but its source build failed because the container's CUDA 12.8 compiler did not match the CUDA 13.0 runtime used by PyTorch. I kept the working configuration rather than changing the environment around that extension.
Two attempts to reduce enhancer time didn't stick. Asking it to skip its thinking pass produced malformed JSON, so the application fell back to the original prompt. FP8 weight-only quantization of the enhancer stayed busy for over two minutes on its first request; I stopped that test and restored BF16.
The final interface leaves prompt enhancement on by default but makes it easy to disable. Skipping it saves roughly 25–35 seconds in the warm tests without changing the BF16 precision of image generation.
The setup I kept
The final Gradio app uses the official Qwen/Qwen-Image-2.1 and Qwen/Qwen-Image-2.1-PE-T2I models. It defaults to 40 steps, true_cfg_scale=1.0, KV caching, and the enhancer's suggested aspect ratio. With no suggestion, it uses 1024 × 1024. A -1 seed selects a random seed; otherwise the chosen seed is shown with the output. I kept the queue to one active generation so overlapping requests couldn't exhaust GPU memory.
The app reports prompt and image times separately, along with peak allocated VRAM, output dimensions, the seed, and the saved PNG path. Those details mattered while testing: a single total time would have hidden the cost of prompt enhancement.
Five examples, three seeds each
I later ran five tasks to see what this BF16 setup actually produced. Each used seeds 2026, 2027, and 2028 at 1024 × 1024, 40 steps, and true_cfg_scale=1.0. Prompt enhancement and suggested aspect ratio were off. Each of the five carousels below shows one task across the three seeds. The edit carousel starts with the original desk photo. Swipe or scroll horizontally to compare them; select an image to open it at full size. The contact sheet also shows all 15 images.
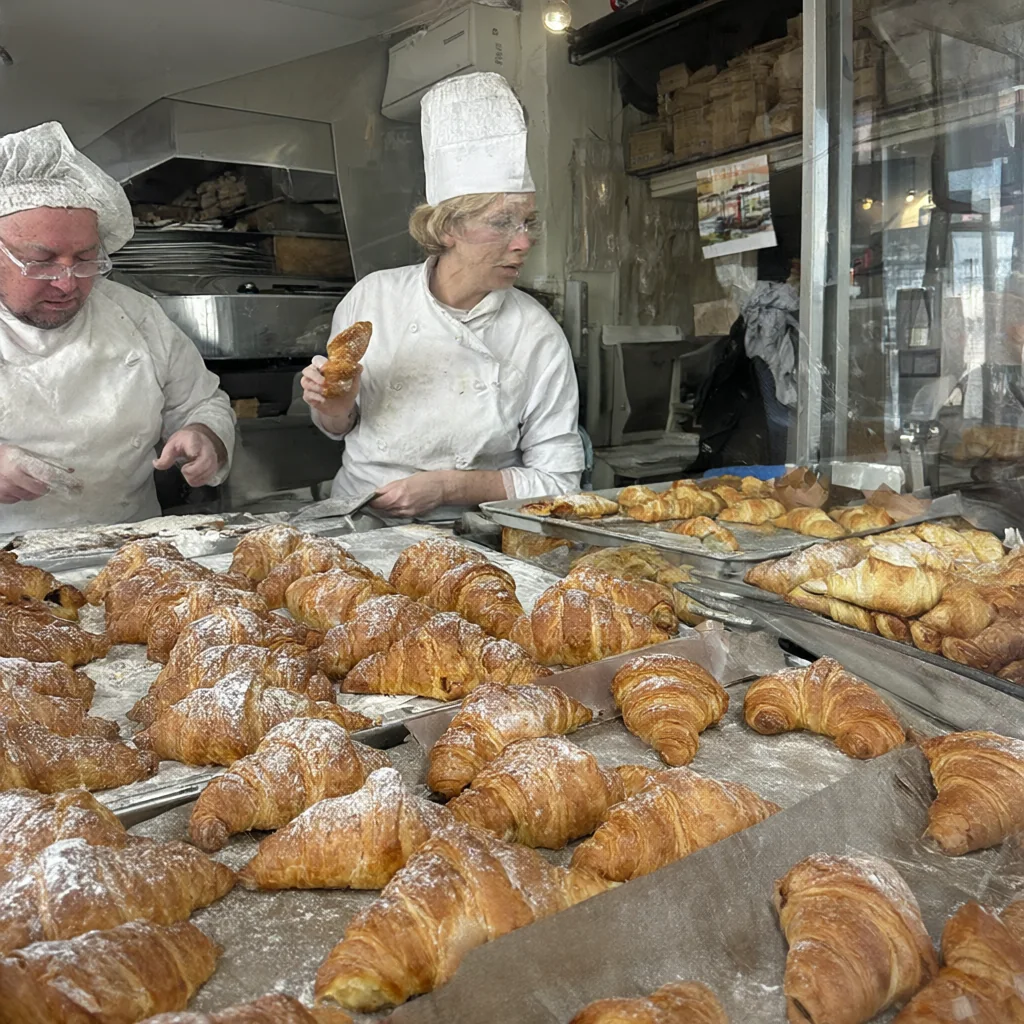
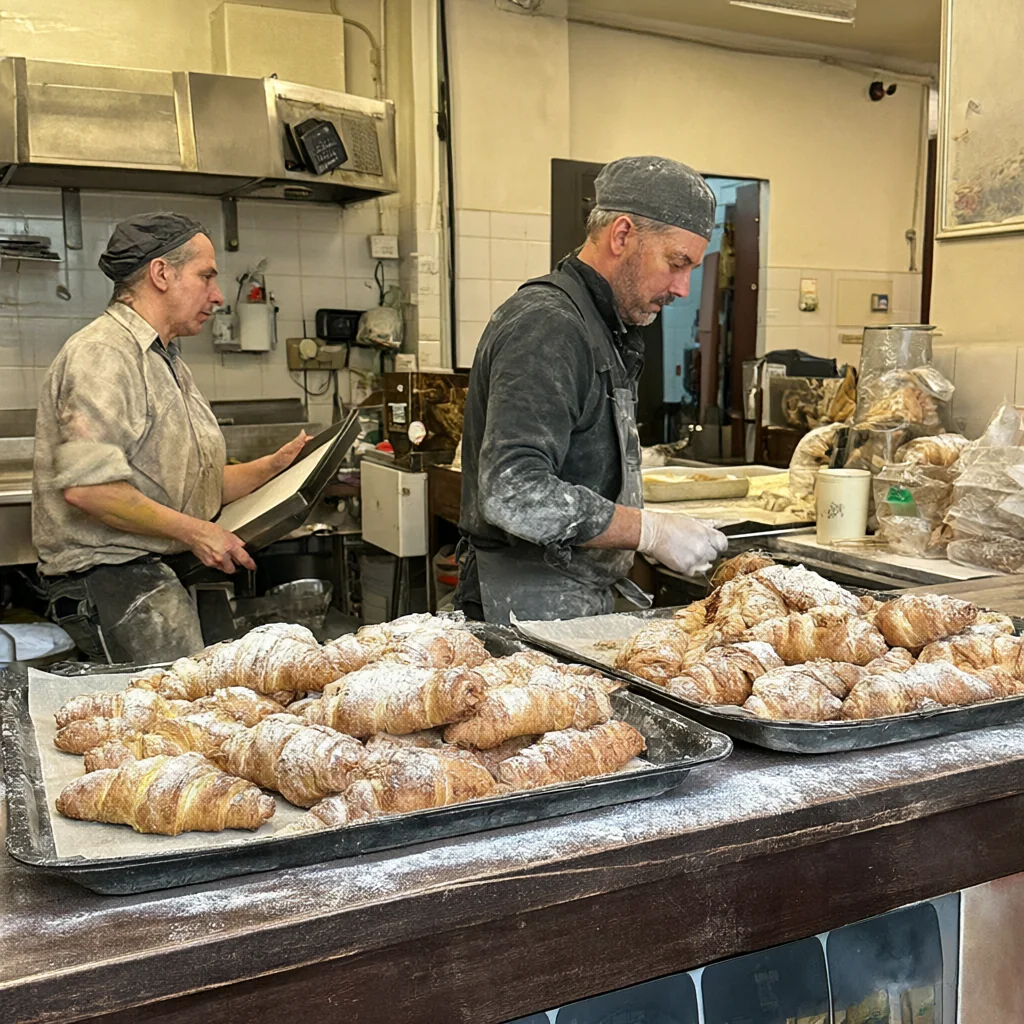
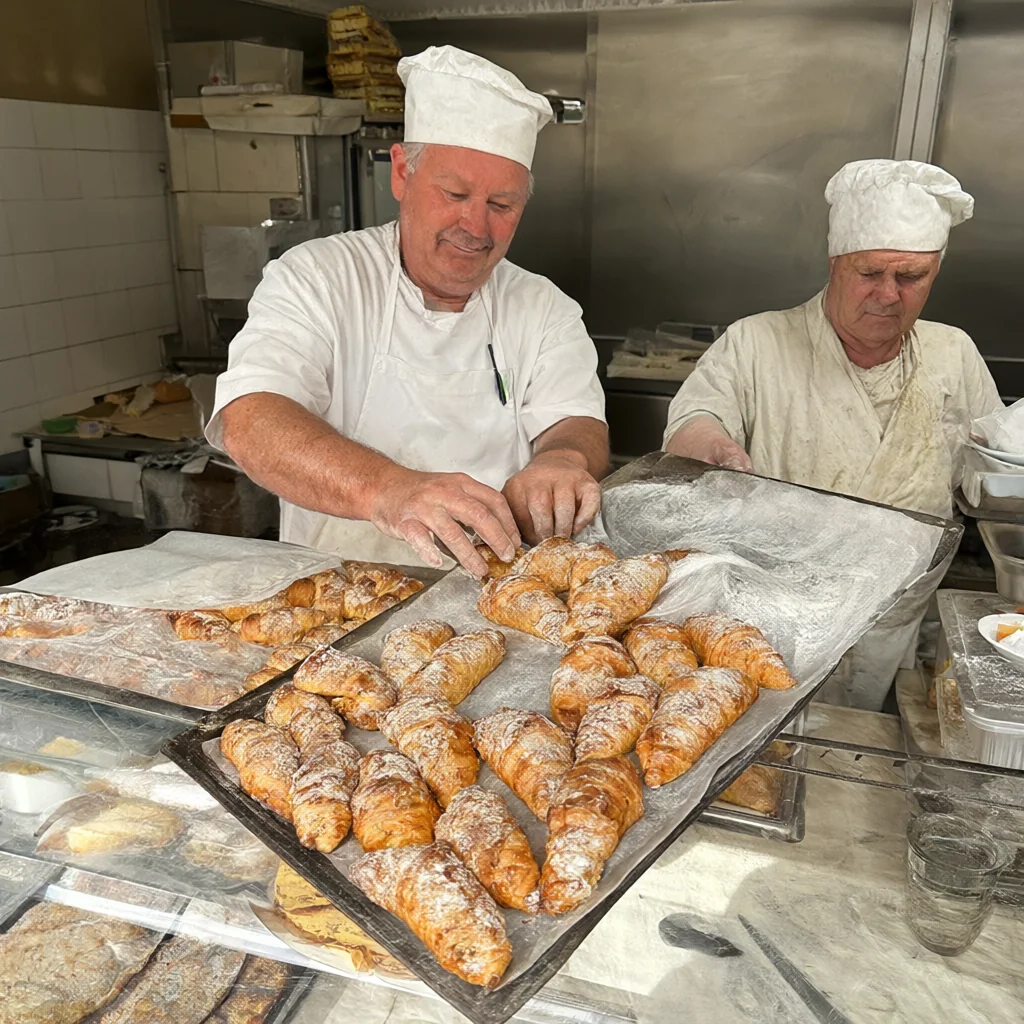
Photorealism: two bakers in an Italian bakery
Exact text: a three-line café poster



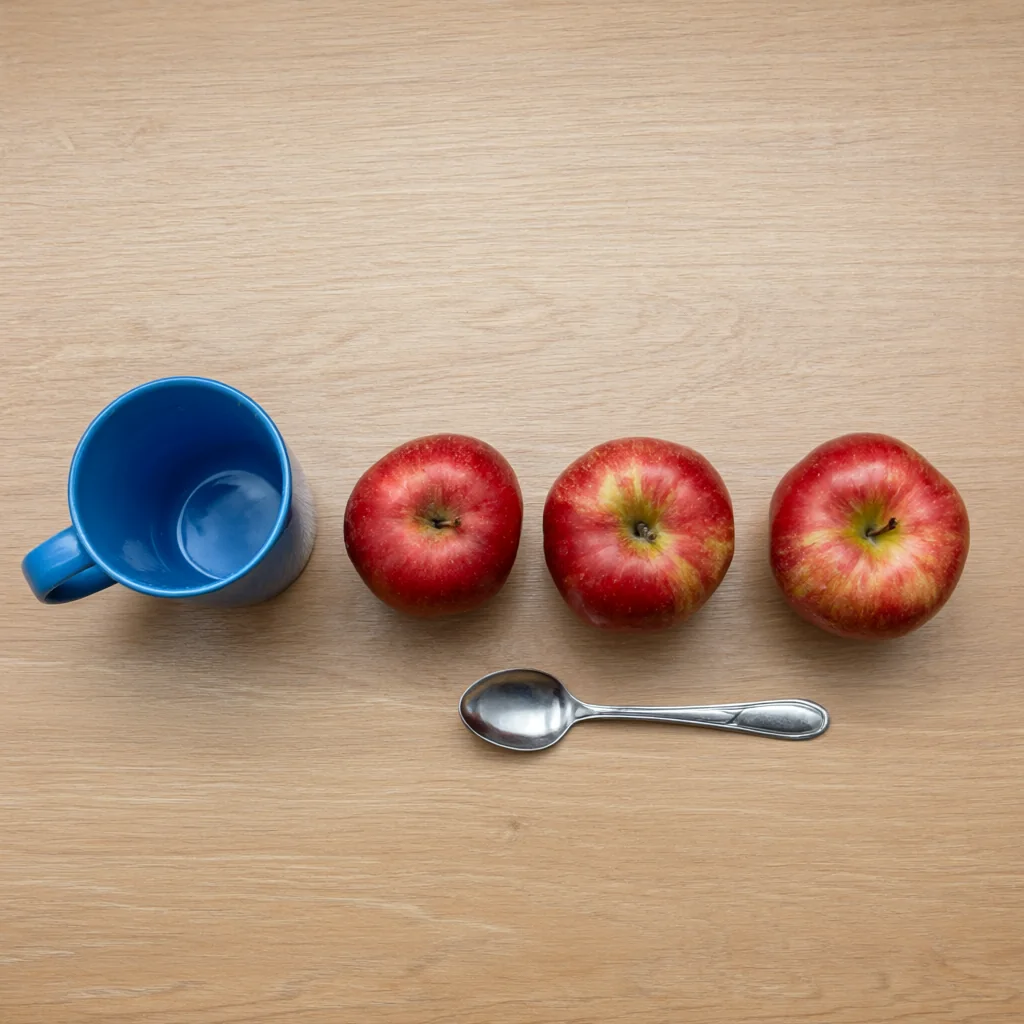
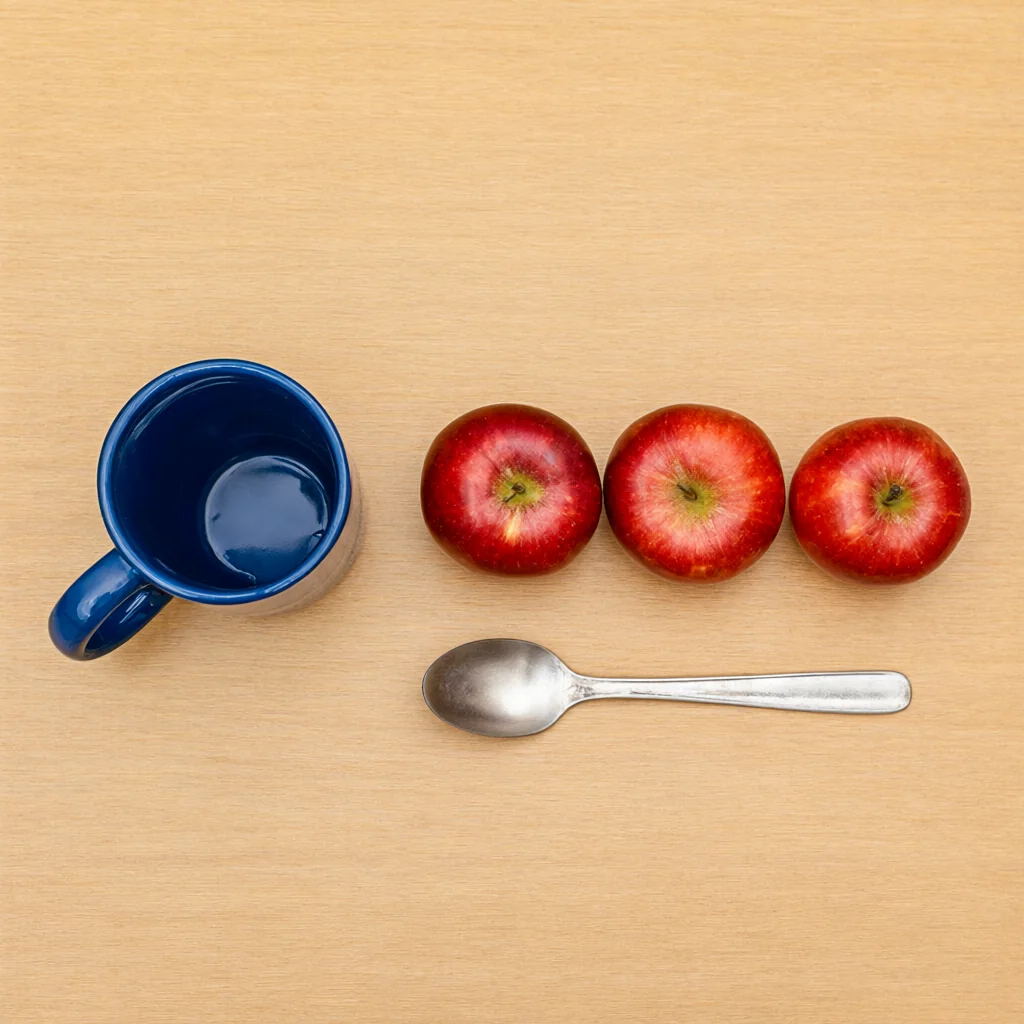
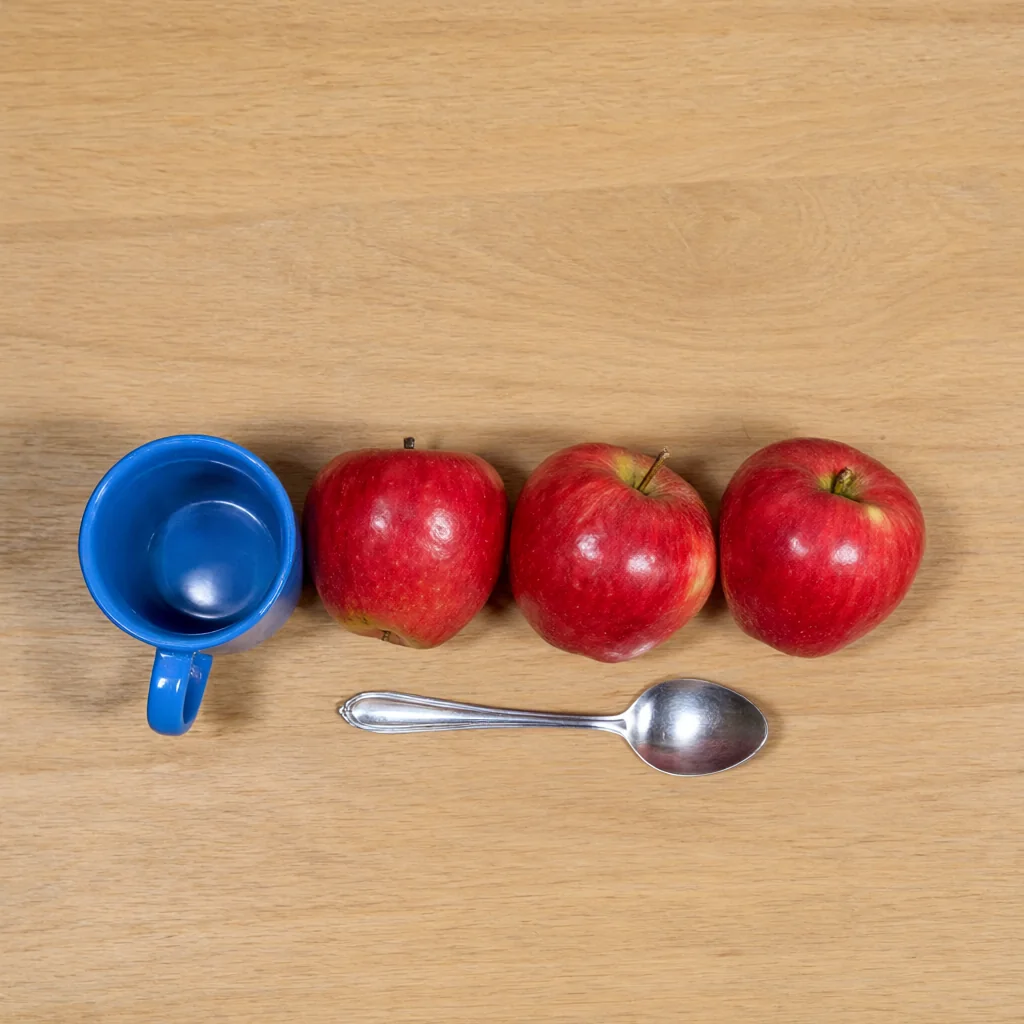
Counts and positions: three apples, a mug, and a spoon
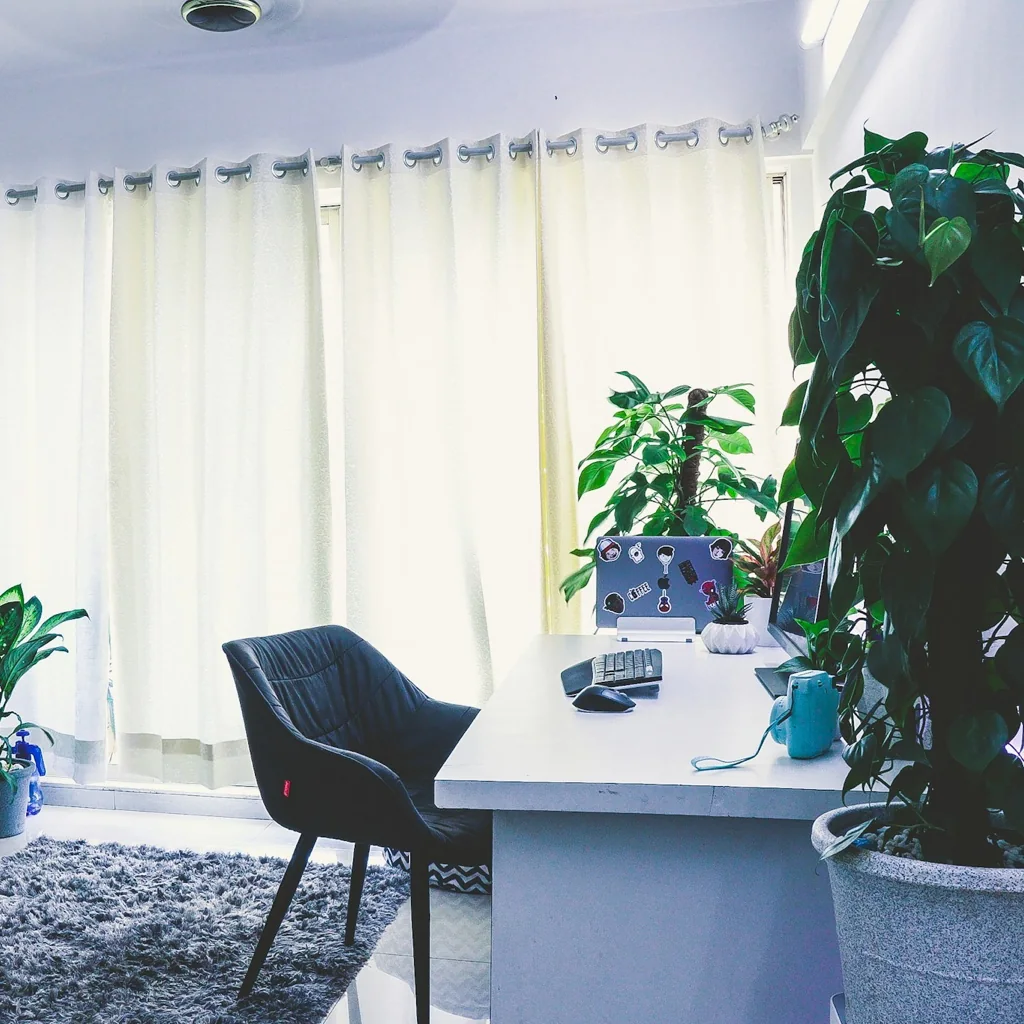
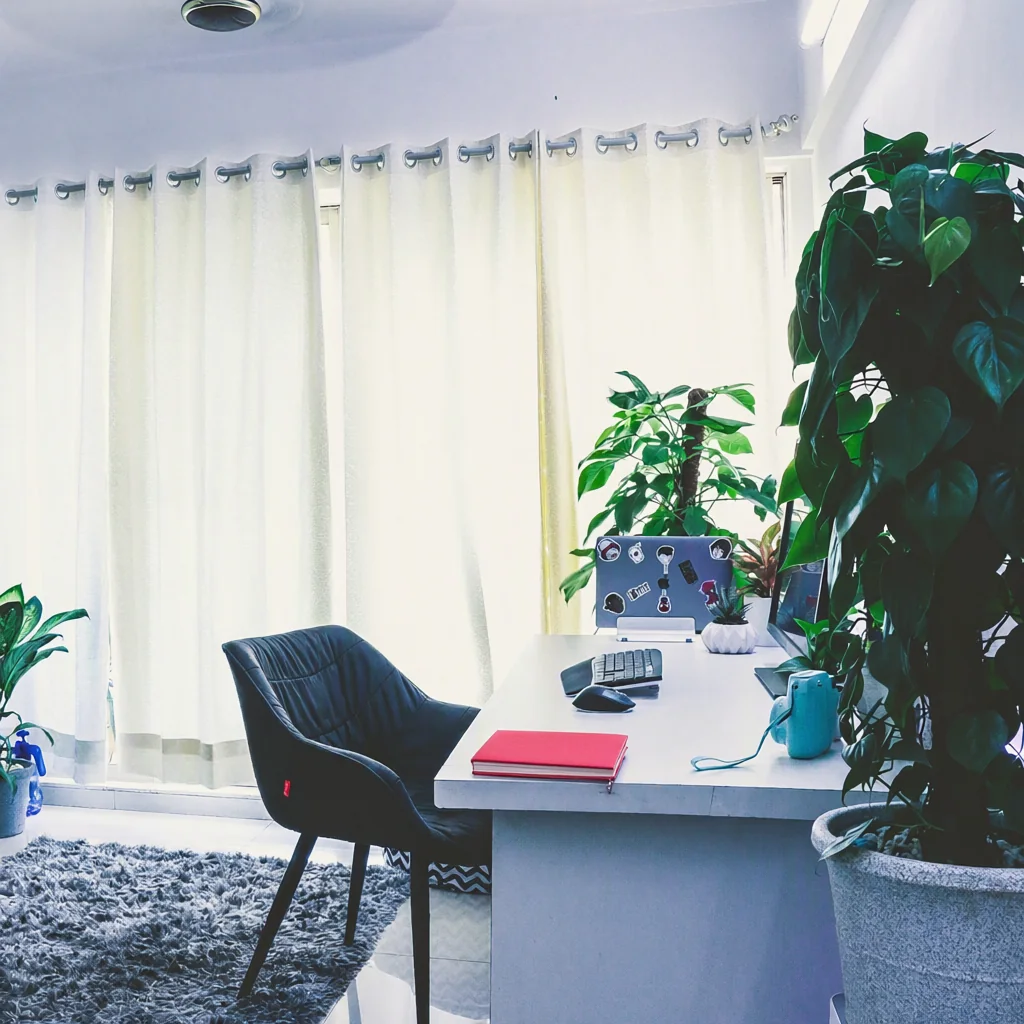
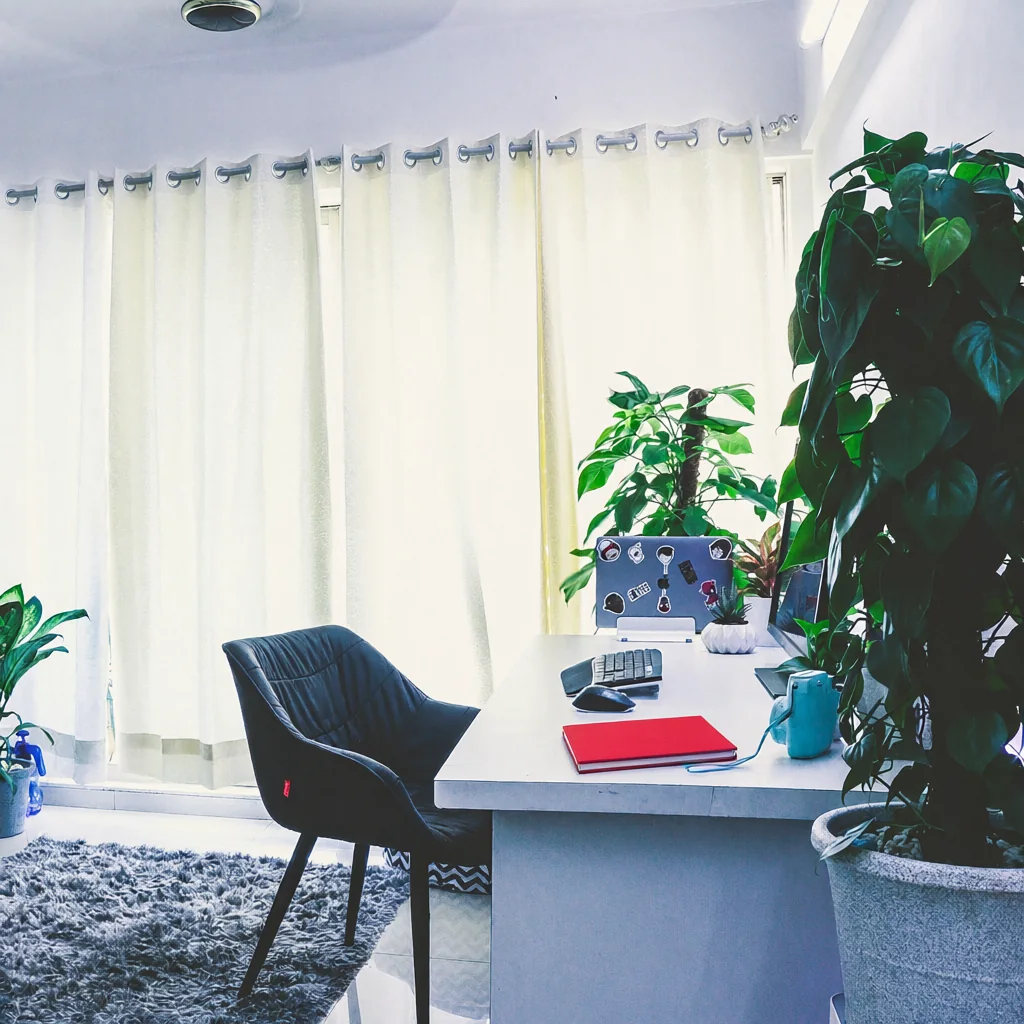
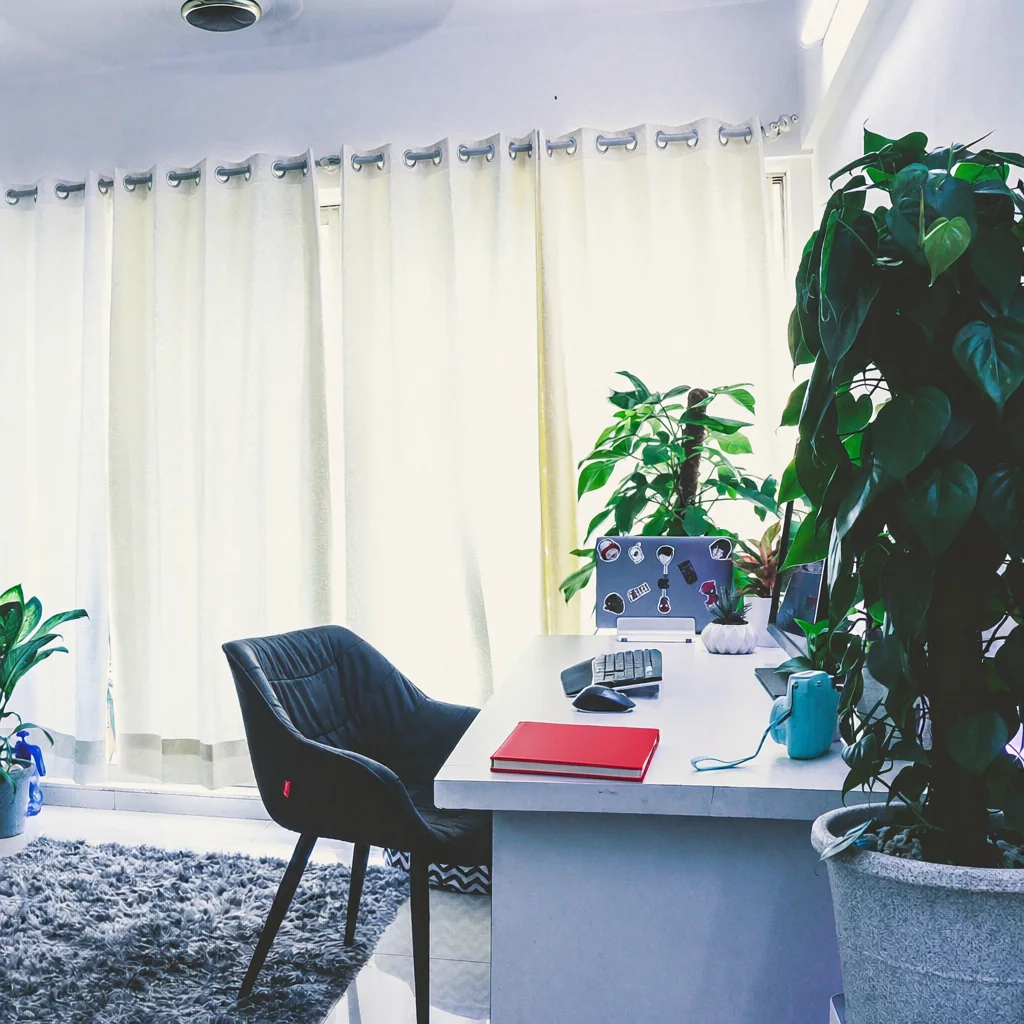
Precise edit: add a red notebook to a desk photo
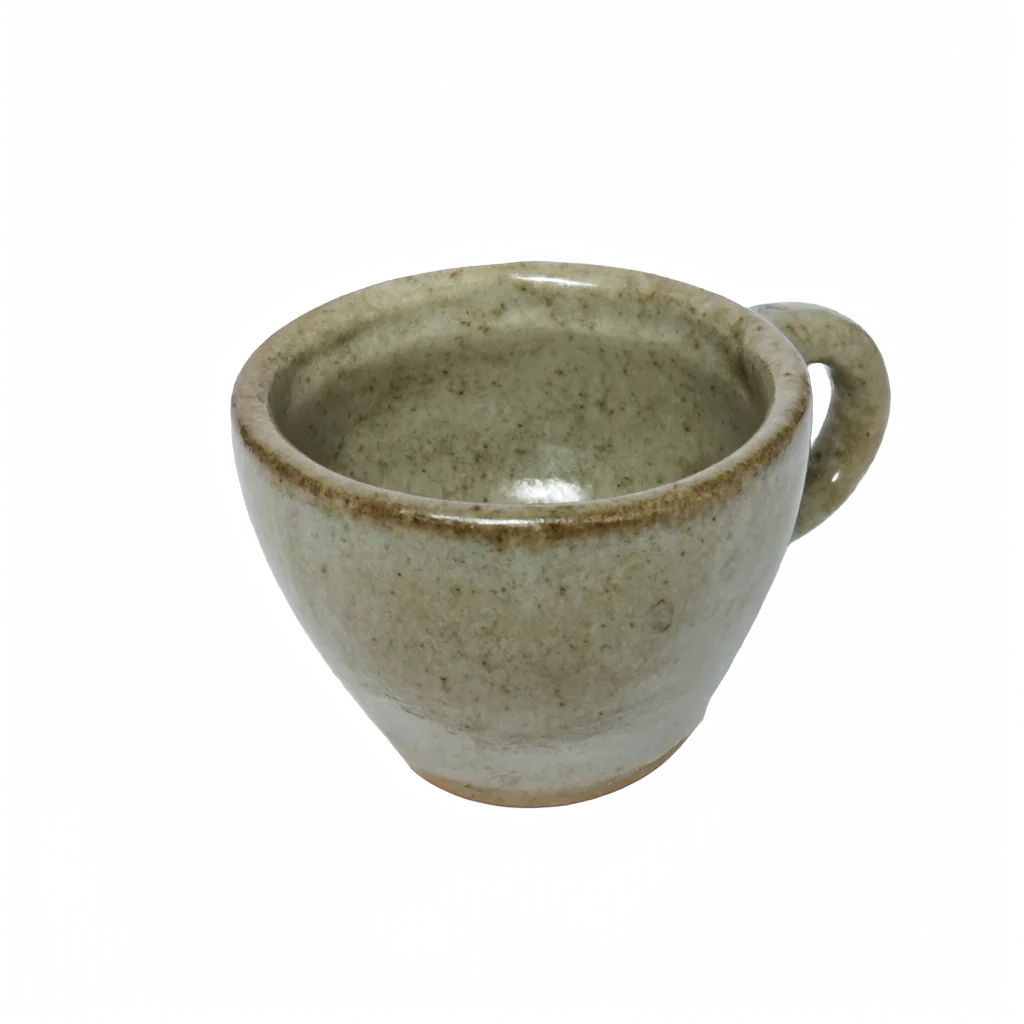
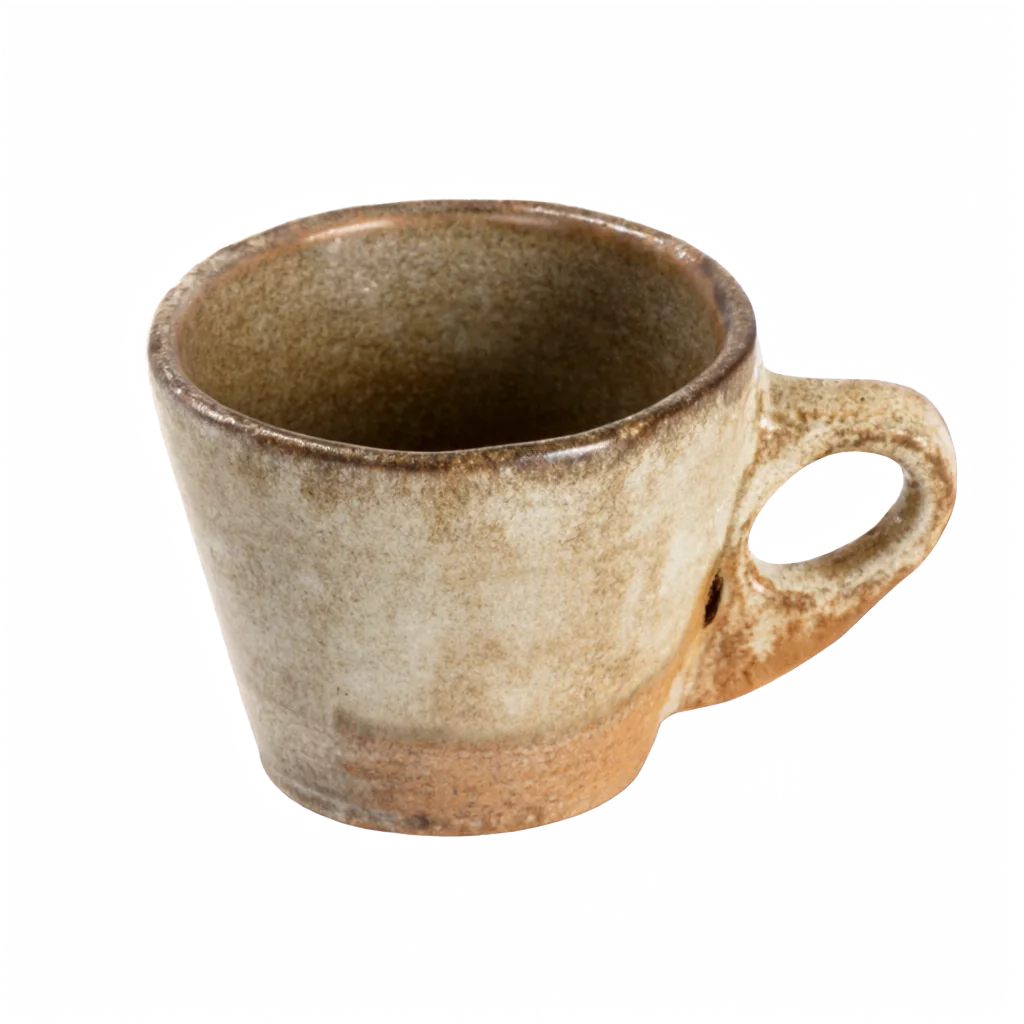
Transparency: a ceramic espresso cup with no background
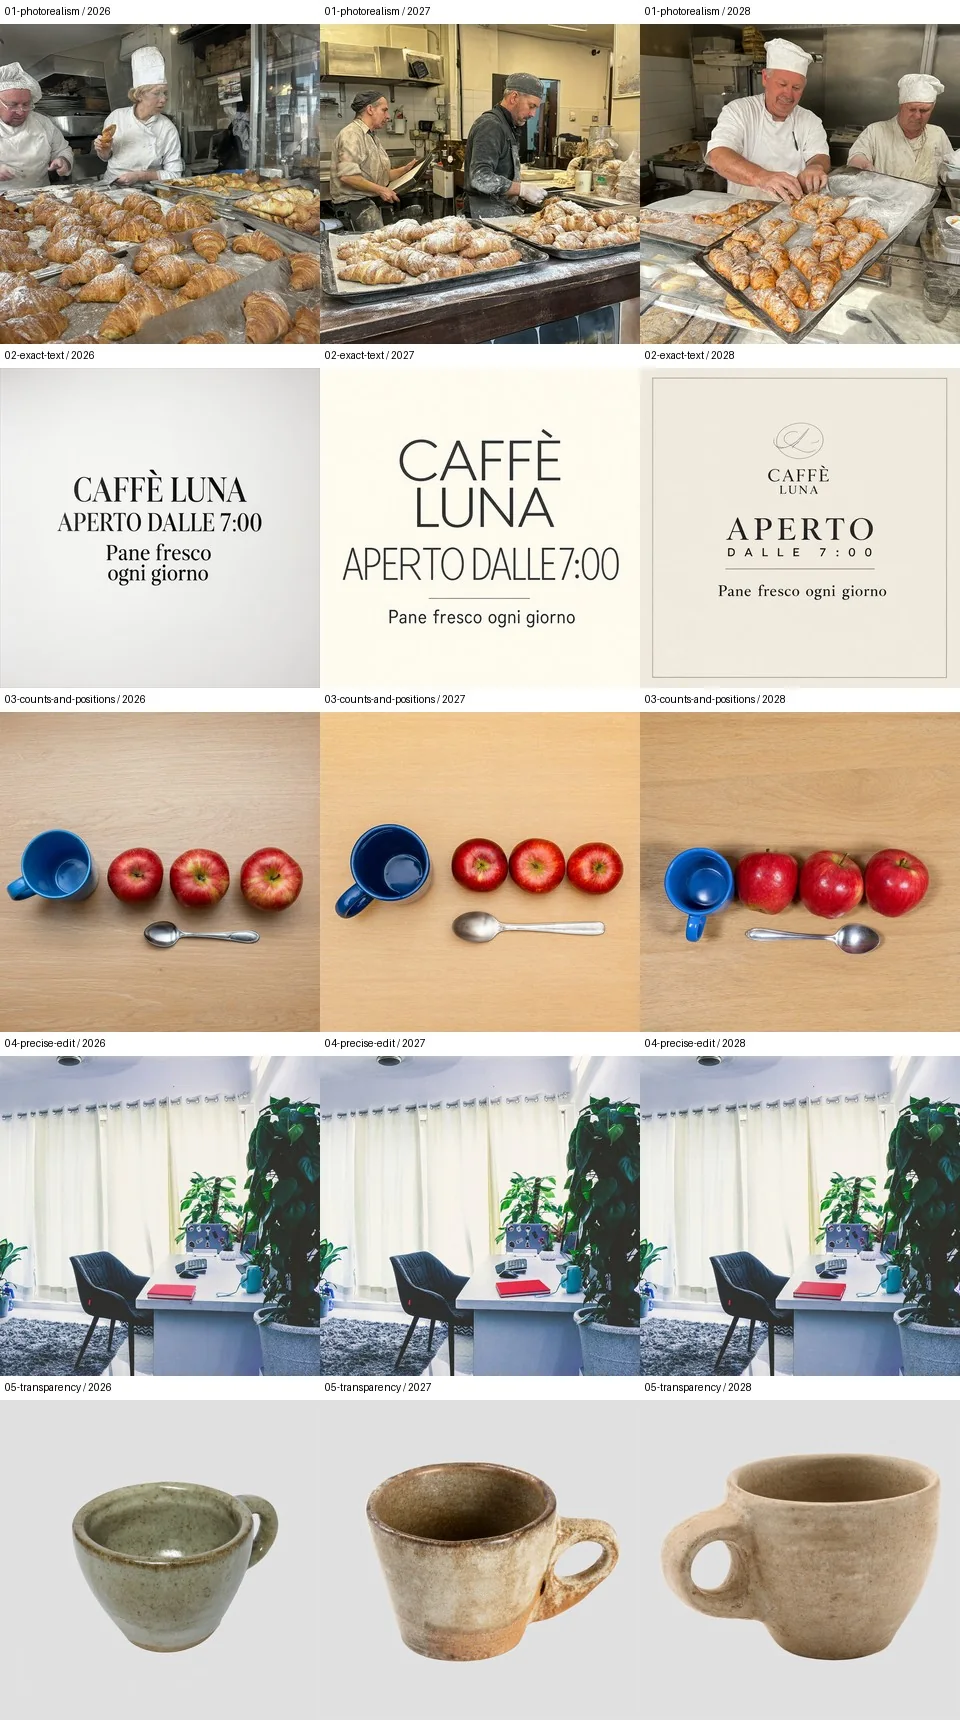
Photorealism. All three seeds produced convincing bakery scenes at a glance. Faces and hands were less reliable on closer inspection.
Exact text. The words and accents were mostly right, but none of the three outputs kept the requested line layout. Seed 2026 wrapped the last line; seed 2027 split the title and ran words together; seed 2028 spread the first lines out and added a decorative mark.
Counts and positions. All three seeds got the count and broad arrangement right. In seed 2028, the spoon extended beneath more than the middle apple.
Precise edit. The notebook landed in the clear desk space every time. The room and camera angle stayed broadly consistent, but small details away from the notebook changed too. The input is a crop of Sanni Sahil's desk photo on Unsplash.
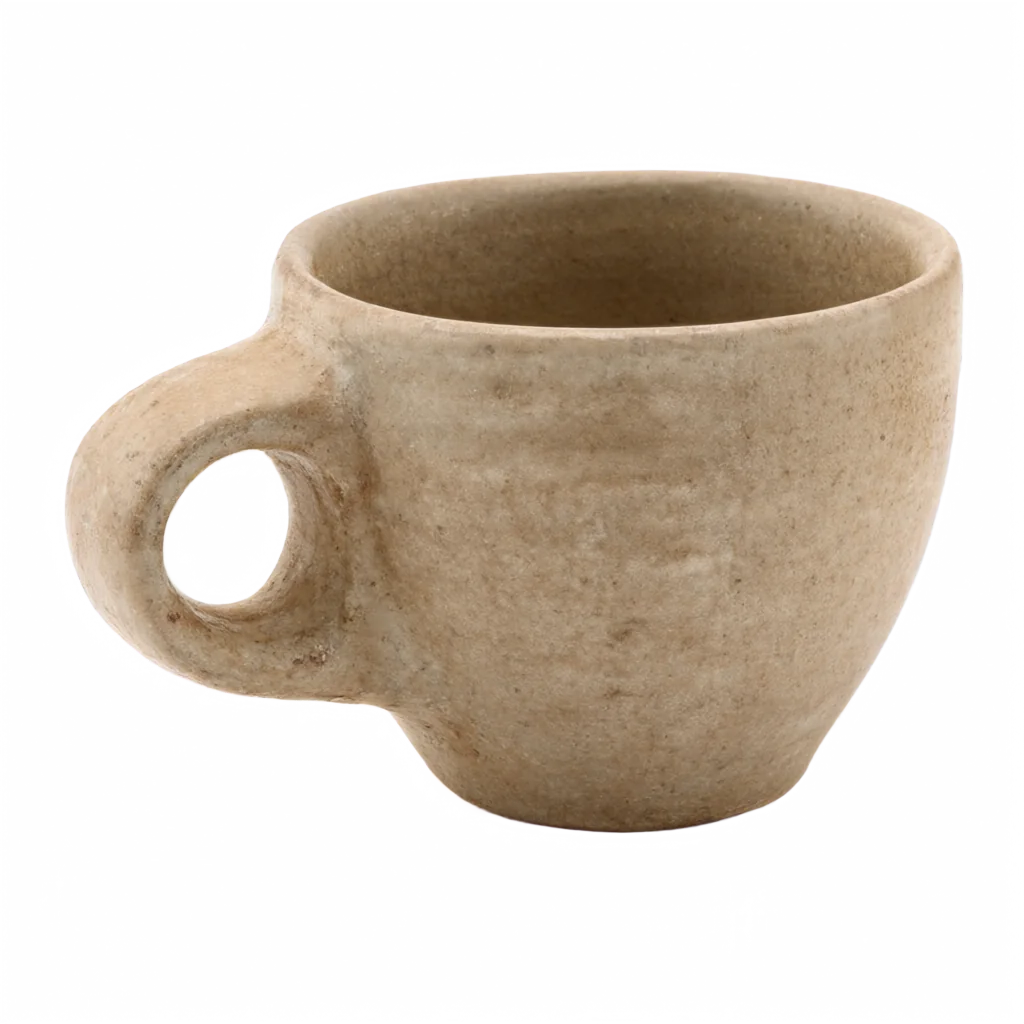
Transparency. All three outputs had transparency around the cup and through the handle. The gallery's WebP copies retain the original PNGs' alpha channels.
Across the 15 images, the image stage averaged roughly 45 seconds for text-to-image tasks and 47.5 seconds for edits. Peak allocated VRAM was 16.4 GiB for text-to-image and 19.1 GiB for edits. This later run used one resolution and three chosen seeds. It did not test the model's native 2048 × 2048 square output or compare FP8 and BF16 images side by side.
A short setup guide
This is the path I would follow to reproduce the final setup, rather than every experiment above:
- Rent a GPU with at least 32 GB of VRAM and choose a recent PyTorch image with support for that GPU. I used an RTX 5090 on Vast.ai with Python 3.12 and
torch 2.14.0+cu130, whose CUDA runtime was 13.0. Check the versions on your own machine; package releases and base images change. - Create a Python environment and install PyTorch, Diffusers, Transformers, Accelerate, Gradio, and Flash Linear Attention. I installed Diffusers from Git because the Qwen Image 2.1 pipeline was available there in my tested environment. The two model downloads filled about 49 GB of Hugging Face cache, so allow for disk space as well as VRAM.
- Load
Qwen/Qwen-Image-2.1in BF16 and callpipe.enable_model_cpu_offload(gpu_id=0). LoadQwen/Qwen-Image-2.1-PE-T2Iseparately. Move the enhancer to CUDA for rewriting, then return it to CPU before calling the image pipeline. - Start with a fixed-seed 512 × 512, 10-step image and prompt enhancement disabled. Once that works, test enhancement and an image edit. Keep edits on the original instruction, without enhancement. Enable VAE tiling only for dimensions of at least 1536 pixels if you observe the same artefacts I did.
- Serve the app on a remote localhost port and forward it over SSH, for example
ssh -L 8080:127.0.0.1:17860 user@host. Openhttp://127.0.0.1:8080/locally. Copy generated PNGs to persistent storage before destroying the instance.
Renting the 5090 gave me a way to try an open image model without owning the GPU. I found that what fits in VRAM and what feels fast are separate questions. Offloading let me use BF16 on a 32 GB card, but the optional prompt enhancer dominated request time. Measuring those stages separately, and looking closely at the images, made the final choice much clearer.